基礎觀念
建立你的第一個應用程式
SEARCH ENGINE OPTIMIZATION
- Introduction to SEOCrawling and IndexingRendering and RankingPerformance & Core Web VitalsImproving your Core Web Vitals
- Lighthouse
- Image Optimization
- Dynamic Imports
- Dynamic Imports for Components
- Optimizing Fonts
- Optimizing Third-Party Scripts
EXCEL
實現 getStaticProps
Next.js 中的提前渲染
Next.js 有兩種提前渲染的形式:靜態生成和伺服器渲染。差別在於它生成 HTML 頁面的時間。
- 靜態生成是其中一種提前渲染的方法,它在建構時生成 HTML 頁面。然後在每個請求中重複使用預先渲染的 HTML。
- 伺服器渲染是提前渲染的另一種方法,它在每次請求中生成 HTML。
重要的事,Next.js 可以讓你選擇每個頁面的生成方法。你也可以創建一個「混合」的 Next.js 應用,通過對大多數頁面使用靜態生成,並對其他頁面使用伺服器渲染。
使用靜態生成 (getStaticProps())
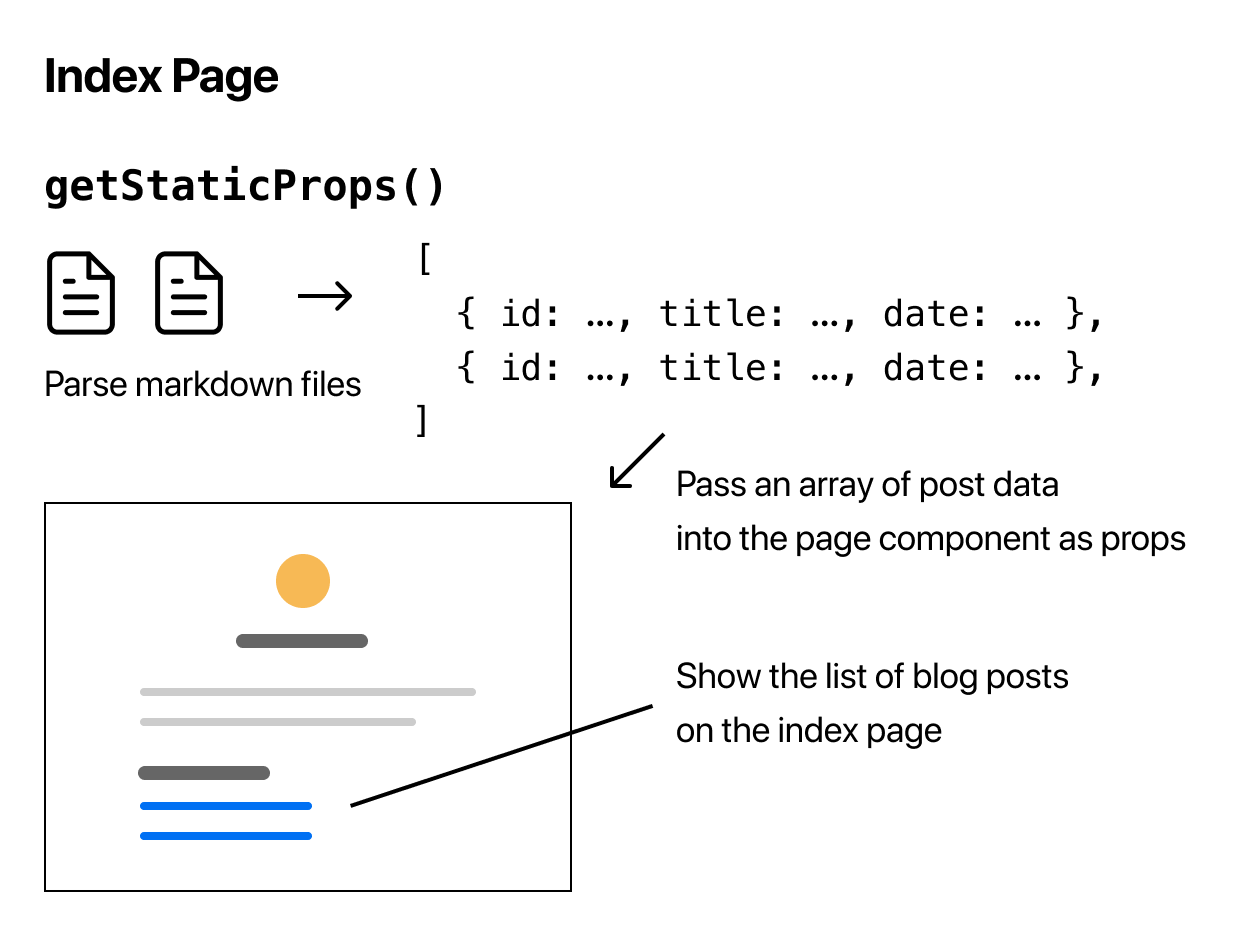
首先,我們需要去引入 getSortedPostsData 並在 pages/index.js 中的 getStaticProps 中使用它。
在編輯器中開起 pages/index.js,然後在 export 的 Home component 之前加入以下程式碼:
import { getSortedPostsData } from '../lib/posts';

export async function getStaticProps() {
  const allPostsData = getSortedPostsData();
  return {
    props: {
      allPostsData,
    },
  };
}
靠著回傳 props 物件,getStaticProps 會把部落格資料傳遞給 Home component。現在你可以像這樣存取部落格資料:
export default function Home ({ allPostsData }) { ... }
為了要顯示這些資料,更新 Home component 並在你的自我介紹下方加入另一個 <section> tag 來顯示部落格資料。別忘了也要把 () 的 props 改成 ({ allPostsData }):
export default function Home({ allPostsData }) {
  return (
    <Layout home>
      {/* Keep the existing code here */}

      {/* Add this <section> tag below the existing <section> tag */}
      <section className={`${utilStyles.headingMd} ${utilStyles.padding1px}`}>
        <h2 className={utilStyles.headingLg}>Blog</h2>
        <ul className={utilStyles.list}>
          {allPostsData.map(({ id, date, title }) => (
            <li className={utilStyles.listItem} key={id}>
              {title}
              <br />
              {id}
              <br />
              {date}
            </li>
          ))}
        </ul>
      </section>
    </Layout>
  );
}
你現在應該可以在 http://localhost:3000 看到部落格資料。

恭喜!我們已經成功拿取外部資料(從檔案系統),並且使用這些資料提前渲染首頁。

讓我們在下一頁談談更多使用 getStaticProps 的技巧。
